


Sarah from Minimize Organize Simplify, a Boston area ‘Home Organizer’ shares her advice for organizing your printed photos!
1.Make A Realistic Plan
Having a clear plan is the first step to organizing anything. Commit to at least an hour of organizing time per session, to make progress before clean up. If you are the type to lose track of time set an alarm and leave yourself 10 mins to put everything away.
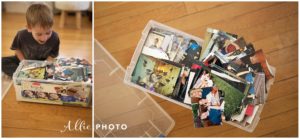
Make sure to have a large clear space to do you sorting whether it’s a large table, floor space, or bed just make sure it’s clear of clutter, or that will bring added chaos to your project.
Next decide how you would like to categorize your photos. There is no right or wrong way to sort them, it just depends on how what makes most sense to you. Think about how you might search for certain photos and that may lead you to the best sorting categories. For instance, I went to 6 different school from 1st-12th grade, so it was easiest for me to sort the majority of my photos by school. You could sort by year, person, jobs, destinations, etc.
2. Stay Positive
Organizing photos can be a time consuming process, but that doesn’t mean it has to be a grueling experience. Turn on some good music or put on a tv show in the background and enjoy the nostalgia that comes from looking through old photos. So much of our lives are rushed and stressful, taking the time to remember and think about the old times can be a nice change of pace. After all, why save so much if you never take the time to look at it? If you begin to feel overwhelmed invite a friend over to help keep you on track. Always remember your end goal and why you wanted to organize your photos in the first place.
3. Find Containers and Labels for Sorting
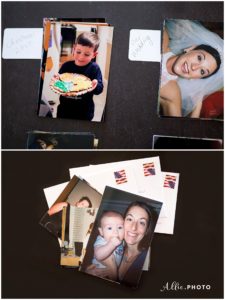
My rule of thumb is never to purchase organizing products before the sorting and purging process. Until there is order you wont know how much you have and what is needed to contain your items. Use whatever you have lying around the house; boxes, bins, bags, excess dishes – feel free to be creative. The point is to have defined areas to put categories in. Make sure what you have chosen to use is okay to use for the duration of your project, whether it be 3 weeks or 3 months. Most importantly, make sure you label every pile with what ever you have handy: sticky notes, index cards or paper.
4. Prevent Getting Stuck
It’s not uncommon to get sidetracked when going through old stuff, but if you find the process difficult because of how distracted you get, then set yourself up for success. There will always be certain photos that require extra time to decide where they belong. Create a pile called “sort later” for these items. When all photos have been sorted and you have made a lot of progress, come back to the “sort later” pile and take the time to decide where these photos belong. Another category to create that will ease the process is a “to share” pile. Old photos are bound to spark the desire to share on social media and through email. Many of my clients have expressed their joy when finding old treasures and sharing them friends and family so I highly recommend it. If you may be mailing out photos also create a “to mail” pile.
5. Finalizing Your Photo Storage System
After all your hard work of sorting all of your photos is now complete, now it’s time to pick out a photo storage system. Thinking about your goals when deciding to organizing your photos can help you pick out what is best for you. Did you want your photos more visible and accessible to share with friends and family that visit? Did you want to organize your photos because they were a jumbled mess in an old damp basement? Choose according to what suits you.
If you like esthetics and attractive storage products pick out a style that goes with your decor or brings you joy. If you don’t have preference on the look then choose according to the amount of space you have. Do you have a bookshelf to store photobooks on? If not, think photo boxes labeled in a closet. Never store your photos in cardboard or damp areas.
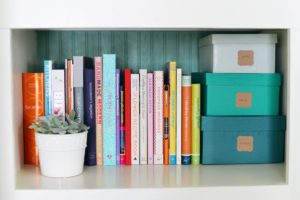
Photo Courtesy of Homedit.com
Lastly, make sure to define an area for incoming and new photos. You don’t have to pull out boxes or an album every time a new photo comes into the house. Have a home for all new photos to be temporarily stored together, a drawer, bin, or large envelope. Every couple of months, when you have the time, place photos in their proper new home.
Minimize Organize Simplify provides customized, professional home organizing services throughout Massachusetts. Sarah helps clients declutter and maximize their space, in order to achieve a functional, stress free environment. Her non-judgmental approach allows clients the support to overcome disorganization and acquire new organizing skills.

posted in:


